Happy Valentine's Day! I am humbly accepting that this can be a fun filled holiday that I once considered fluff. Actually, I was sort of told off very publicly that children love it, so I tried to embrace it - in a less fluffy way. Z needs new pajamas because hers have become "capris" and it gets chilly at night.
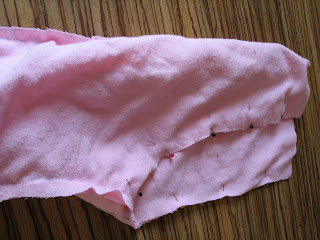
I did the old trick of using a pair of Z's pants that fit to create the pattern, which I lay out, pinned and cut of some lovely pink flannel I had. Now, this picture primarily shows how very ridiculous I can be about trying to get as much out of a piece of fabric as possible. I think it's sort of wonderful that people take great pride in being frugal these days. I've heard people boasting about how cheap they are, and it's a good thing because waste is waste.
I've made a lot of pants since Z came along and I still always get flipped about and mess up. I've started marking the fronts with safety pins and taking extra time to think. I sewed the legs together first - front to back, right sides together (as much as there is a right side of plain pink flannel), outside seams then inside seams. Also that blur is one of Z's dolls dancing over the project and spouting off things I say.
I like sewing the two legs together by inserting one leg (right side out) inside the other. I get less confused this way.
Next I formed the waist band for the elastic. I had to go back to her original pants to make sure I had it right, but that's the nice part of having them as comparison.
Here is the little opening I left to insert the elastic.
And the elastic going in.
To make the PJs something special, I used a drawing I'd done earlier of two cats with entwined tails. I printed it out onto iron-on paper and planned to iron it onto black craft felt, making it firmer and help it hold it's shape. I planned to then sew this on as an applique.
The heat of the iron melted the craft felt - live and learn.
I decided to pencil in the cats and freehand it with fabric paint.
I haven't quite mastered fabric paint, but I still think the cats are a sweet addition. Also, those paying close attention will note that I never hemmed the pants. I have to do that by hand as I forgot to do it before sewing the inseams.


